Archive for November 2013

Do you know what that’s the sound of? A registry gun!

registering
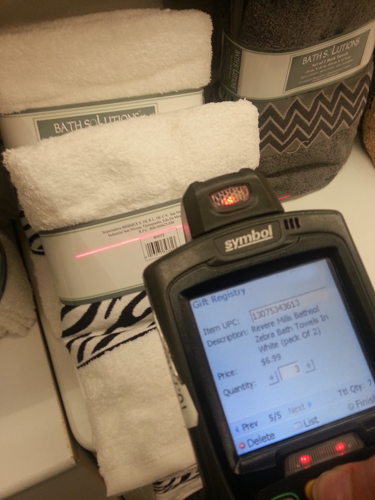
I couldn’t resist the zebra print towels! // Personal photo

The only category left to tackle on the wedding website was Registry. Between college, moving to two states and living with Mr. PB for almost three years, I have accumulated a lot of home items. I always told myself that I’d put a Kitchenaid mixer on a wedding registry one day but Mr. PB gifted that to me our second Christmas together. A wedding registry intimidated me because I knew there aren’t a lot of items for us to put on it. The intimidation grew when I saw all of the suggestions on the web for the number of items to register for based on guest count – much more than I anticipated we could come up with.

With around 150 guests, that’s at least 120 items we should register for. // Source: It’s a Brides Life

We decided that we would do a traditional registry at a store, along with a honeymoon registry, like many other bloggers. The honeymoon registry would provide more options for our guests and to help make the honeymoon a bit more budget friendly.

After reading posts from many bloggers about the different honeymoon registries, I decided to sign us up for Honeyfund and pay the $45 for the premium site. By doing so, it gave the site a more professional and personal feel, which I feel will help those who are hesitant deviating from the traditional store registry. To find items to add, I scoured through different trip, restaurant review and attraction websites. Mr. PB even looked into some restaurants that he thought he would want to visit. When putting the items on our Honeyfund, I broke each item down into $20, $25 or $50 increments so people could contribute at varying levels. I also included a link to the place’s website (if available) and wrote up a blurb for each one.

honeyfundA sample of our Honeyfund // Source: Screenshots from Honeyfund

I added the cost in the description to help people understand why we want six $50 Disneyland items – because the total cost is approximately $300. And yes, you read that right, our airfare has already been fulfilled by some amazing family members! We were able to get the tickets at a steal (less than $600 total for both round-trip tickets!). Tip: Honeyfund will email you when someone purchases something off of your registry. If you decide to do a Honeyfund and you want the element of surprise to be kept in tact, you should set up a rule in your email account so the emails redirect to a subfolder.

As for our traditional registries, we went with Target and Bed Bath and Beyond. At first, we only picked out about 30 items from the two stores combined because everything we looked at, I figured we already had – plates, silverware, serving dishes, towels. After discussing with my MOHs, I realized that maybe it would be a good idea to upgrade items we already have, such as matching silverware vs. a haphazard collection, glass platters vs. plastic, coordinating towels vs. mismatched ones. With this thinking, we were able to increase our registry eightfold.

registries

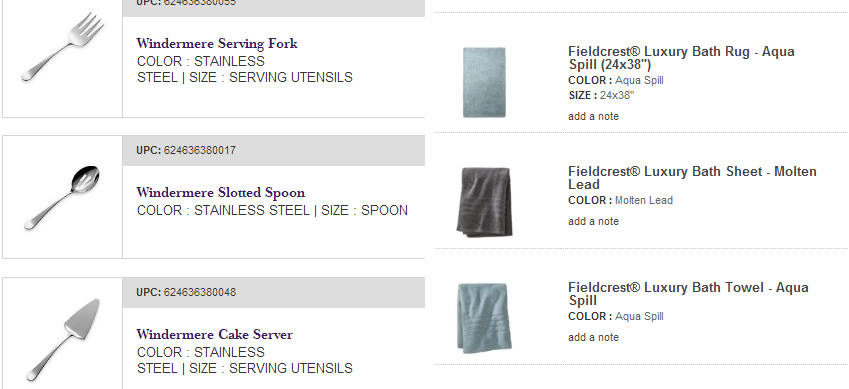
Real, adult items – upgrades from our current collection // Source: Screenshots from Bed Bath and Beyond and Target

Being the math and numbers lover I not so secretly am, I compared the number of items on our traditional registries and Honeyfund to the above chart. The result?

compareOur registry by the numbers // Personal Photo

So what did I deduce from this comparison? We registered for more items than suggested but the cost of those items is half the suggested value. What does this mean? Nothing, really. We registered for what we would like and/or need and didn’t follow any rules. Just another example of taking suggestions as just that, suggestions, not rules to live by.

How did you decide what to register for? Did you find a resource that was helpful when you made your registry?

I am so tempted to write this entire post as if it were an episode of my favorite game show as a kid:

Yes, I was a nerdy child who enjoyed educational television. Ain’t no shame in my game!

Anywho, Mr. PB and I love adventures and roadtrips so a honeymoon seemed like a nobrainer. Well, a nobrainer in theory. Seeing Mr. PB and I are footing the large majority of the bill for the wedding, we had to make sure that a honeymoon was something that could fit in our budget. After I crunched some numbers and figured things out, Mr. PB and I reviewed things and decided a honeymoon is a go, as long as we are conscious of the cost.

With our budget, overseas options went out the window. Bye bye to Europe, Africa, South America, Australia and Asia. (I’d say sinara to Antarctica as well but let’s be real, it was never a contender.)

My first thoughts went to the white, sandy beaches and turquoise waters of the Caribbean and Central America. I mean who could say no to this:

This is the kind of stuff that calendars (and wallpapers) are made of. // Source: HD Wallpapers Inn

These locations were still a bit out of our price range. We even considered options available on Groupon but once airfare was factored in, honeymooning there would have maxed out us. And while the hotels offered excursions and some activities, Mr. PB and I aren’t sit around and lounge kind of people. We want things to see, activities to do, plenty of places to eat. We said adios to locations south of the US.

So, America and it’s lovely neighbor to the north were still on the list. Mr. PB and I have visited Canada a handful of times seeing it is less than two hours from us. Plus, we’d be honeymooning in March and their weather wouldn’t be much warmer than what we’d be getting at home. Canada, à tout à l’heure.

The good ol’ USA is probably counted out as a great place to honeymoon by many people but through searching, there are plenty of awesome places with lots to do throughout the US. Some cities that piqued my interest included:

Orlando – where Mickey and Minnie live // Source: Orlando Health

New Orleans – where the good times roll // Source: Destination 360

Miami – where LeBron took his talents (Go Heat!) // Source: Cheap Florida Bus

Outer Banks – where just about every Nicholas Sparks book is set // Source: National Geographic

Each of these places are beautiful and I would love to vacation there but they’re places that Mr. PB and I could see ourselves getting to in the next 10 years. We wanted our honeymoon to be somewhere that we probably wouldn’t visit in the next decade or so, making it a bit more special. Being an east coast couple, cities on this side of the country are easier to get to for vacations so the above cities were out as honeymoon spots. Our sights began to set on crossing time zones and heading out west. We wanted somewhere with a beach, lots of things to do, great food, good weather in March and easy to travel to. After much research, the winner is… (drumroll)

San Diego – where we will honeymoon! // Source: Bubblews.com

San Diego has a great mix of activities, beach life and food, all close distance to each other. There is also an airport with lots of flight options. We are super excited to spend eight days and seven nights in this beautiful city!

Have you visited San Diego and have any recommendations? Did you choose to honeymoon in the U.S.?

As part of my job, I am updating websites on a daily basis. It was only natural for me to create a wedding website. I don’t know complex HTML or any other fancy coding language and I wasn’t interested in paying money for a website, so that left the plethora of free wedding website options that are out there. There’s Wedding Wire, The Knot, MyWedding, eWedding… the list goes on and on. I perused the options out there and chose based on what templetes the sites had to offer. The winner: WeddingWire.

website

They have over 100 options and a lot of their options have different color schemes as well. Keeping our brand in mind, I wanted something with the jewel tone/gray color scheme so that narrowed down the options. A great thing about this site is that you can pick one design, put all of your content in and then decide that you want another design instead. You simply change your design and the whole site changes, no need to rework the site.

Another great thing about WeddingWire is you can customize your URL so it is weddingwire.com/somethingpertinenttoyourwedding. To keep consistent with the football feel of the Save the Dates, I wanted to have our clean URL be teamlastname (like teamphonebooth) and luckily, that wasn’t taken. It’s so much nicer to share a clean URL than something funky like

Friends and family, please visit our wedding website at:  http://www.weddingwire.com/wedding/UserViewWebsite?wid=b94f2a26po808574&themeCode=&is_demo.

After picking the design (I chose Sweet Hearts – Lipstick), I was brought into the content management system. If you are scared of making a website – don’t be! Wedding Wire creates basic categories for you by default, such as Welcome, Bride & Groom and Our Story. All you do is click on a category and on the next page, you’ll see a box very similar to Microsoft Word. Just type in there and save – viola! You are a website GENIUS!

You can stick with the main categories, remove some, add some… whatever floats your boat. The categories that I boiled everything down to were:

- Welcome
- Bride & Groom
- Our Story
- Wedding Party
- Ceremony & Reception
- Guest Accommodations
- Honeymoon
- Registries
- Leave Us Some Love!

I used the same information I used in our intro post for the Bride & Groom section, a condensed version of the two-part how we met story for Our Story and the same bios I shared here for our Wedding party. Killing two birds with one stone – love it! Ceremony & Reception and Guest Accommodations were easy to fill out with location details and the Leave Us Some Love section is a guestbook so I didn’t need to do anything there.

The only downfall I have found to Wedding Wire is that the mobile view doesn’t include all of the categories nor does it include pictures you insert into the pages. This meant the Wedding Party and Honeymoon pages are not available on the mobile site and I wanted to make sure people read those pages, especially the write ups about some of our favorite people. It does have an option to view the main site so I decided to add a blurb to the bottom of our Welcome page saying “Note: Those viewing the mobile version of the website will not have access to all of the content. For optimal viewing and additional content, please choose View Full Wedding Website from the bottom of the main menu.”

mobileview
A screenshot from my phone of our wedding website. // Personal Photo

With only Honeymoon and Registries left to be filled out, it put the pressure on Mr. PB and I to figure out our honeymoon plans and start registering for some items.

Did you use Wedding Wire for your wedding website? Or did you use another site that has a cool feature that would be good for other bride’s to consider?

Once Mitch delivered our engagement pictures to us, I wanted to get right down to designing our save the date. I had some experience with Adobe InDesign at two internships so I planned on tackling the design aspect. Mr. PB and I both love football so jumping on the bandwagon of the ticket style save the date only made sense. For those who don’t have a design background there are plenty of awesome versions on Etsy.

A great photo + some great design = this Save the Date from ModernMamaDesigns

I love the team colors used throughout this Save the Date by PrettyMyParty

I had purchased a Groupon for Vistaprint so before I started designing, I checked the available sizes on the site. I contemplated making my own size and trimming them down, but then I’d need to find different envelopes and I’d have a bunch of envelopes left over. So I went with what Vistaprint had to offer – 4″ x 8″ holiday cards. Granted, they’re bigger than the typical Save the Dates but we send holiday cards that size so no big deal.

I had a few requirements for the Save the Date:

  • I wanted to use more than one picture. Mitch did such a great job and I wanted to show off his work.
  • I knew I wanted to include a link to our wedding website. I hadn’t made the site yet but I wanted to give people another place for more information.
  • I wanted to keep things in alignment with the wedding brand.

I started finagling using InDesign and surprisingly, I was satisfied with the design pretty much out of the gate. This was different than the attempts I had made towards coming up with an invitation design (more on that later). So the design of the Save the Date was rather quick and Mr. PB even approved. His only request was that I add a QR code to the back where originally there was only a photo. I obliged using Kaywa, a free QR code generator. And the final result…

savethedate_pbThings are getting real, people! // Personal photo

Once I placed the order through Vistaprint, it meant I needed to get my butt in gear. I wanted to have the wedding website finished before I could send out the Save the Dates, so that meant I needed to create a website and fill it with content. Part of that content needed to be our registries and our honeymoon information. Up next: wedding website!

Did you take a stab at designing your own Save the Dates? Anyone else go with the ticket style?