After oogling plenty of pretty engagement photos, I needed to go on a scavenger hunt for the appropriate props and outfits for Mr. PB and me.
In the prop department, I needed:
- balloons
- an ampersand
- a football
- cupcakes
The balloons were easy, peasy, lemon squeezy. I just went to my local Party City and ordered a dozen balloons in the wedding colors.
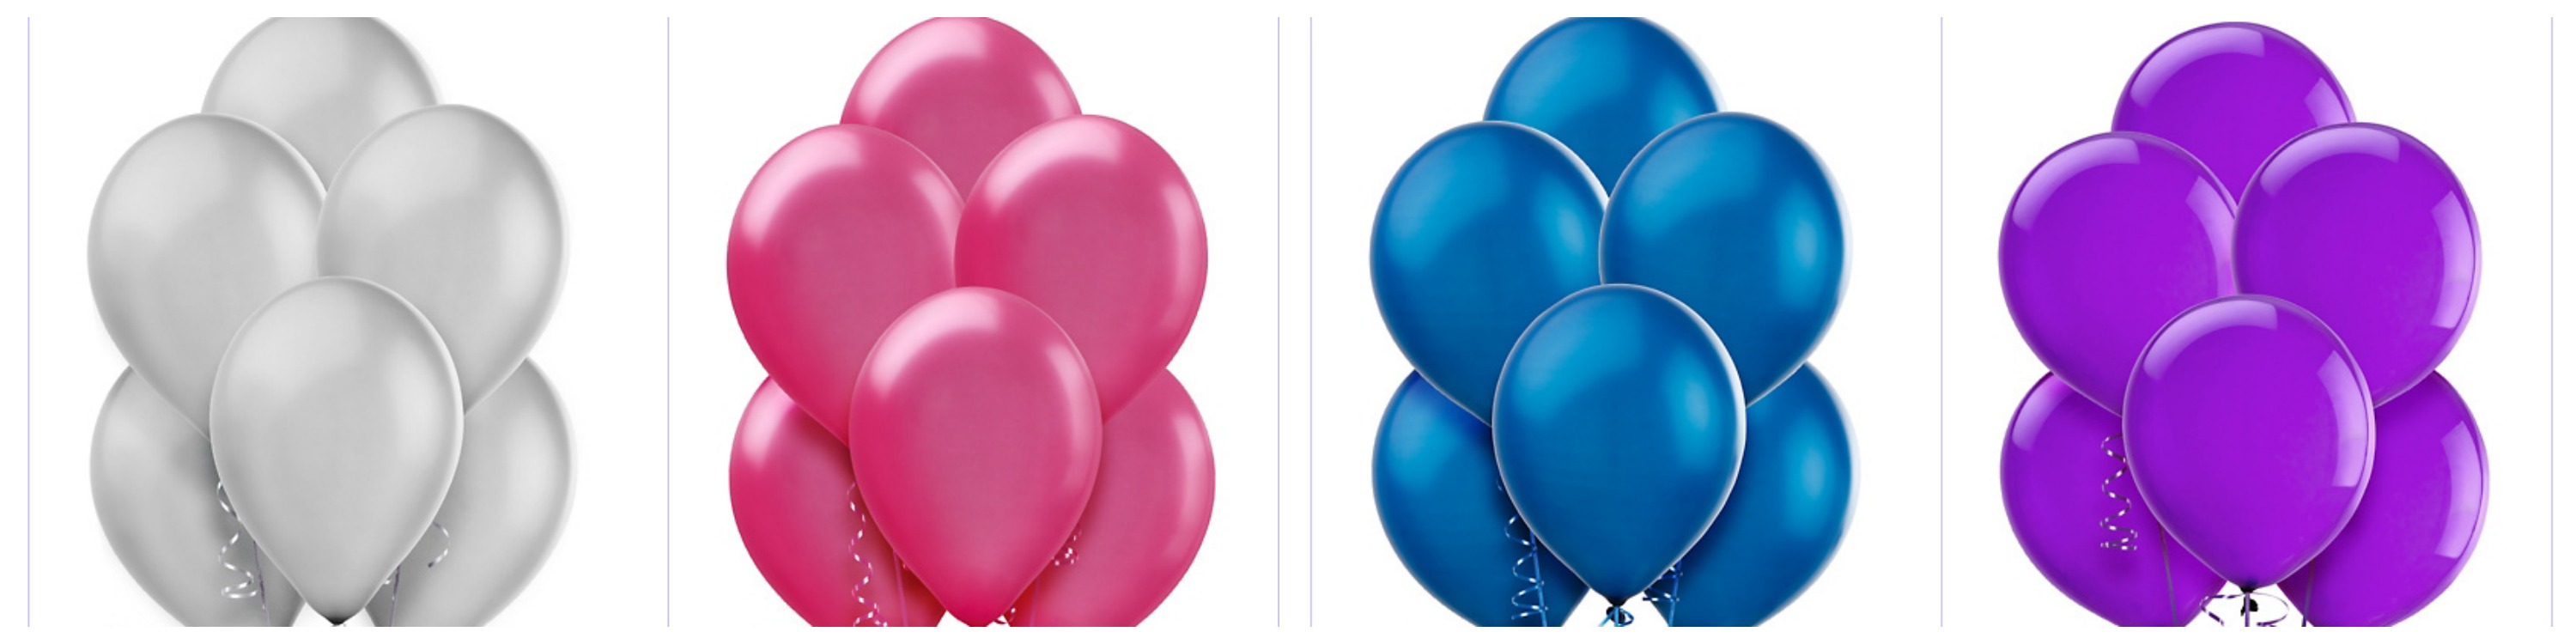 That was easy! // Source: Party City, put together using Picmonkey
The ampersand was a bit more difficult. I did a lot of online searching for a wooden ampersand and was striking out. I found some on Amazon and Etsy but they were either too small, too expensive or a font I didn’t like. (I’m sort of a font snob.) During a day of window shopping, I stopped at Marshalls and was looking through their home decor department. Low and behold, they had a fuchsia ampersand. I was originally looking for a white or charcoal colored ampersand so it was momentarily disappointing. I even purchased charcoal colored spray paint but opted against potentially ruining my only shot at having an ampersand. But the more I thought about it, the better the fuchsia ampersand was. It meant Mr. PB and I could coordinate our outfits with blue and purple and then the fuchsia ampersand would be the final piece to representing the entire color palette. I’d like to say I planned things that way and sought out a fuchsia ampersand but all the credit for this one goes to fate.
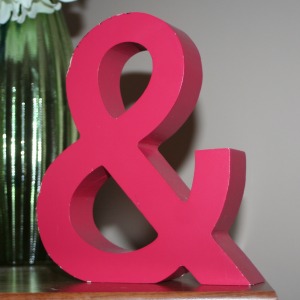 Pretty pink ampersand. // Personal Photo
For the football, I just went to Walmart and picked one of the many options. (This is the one I chose.) My only concern was that it had one of its panels blank for me to write the date on. I have a slight Sharpie obession so I knew I didn’t need any marker. I could have preplanned the date but instead, I went cRaZy and freehanded it. Could it have been more even and perfect? Sure. Does it really matter in the end? Nope! It did its job.
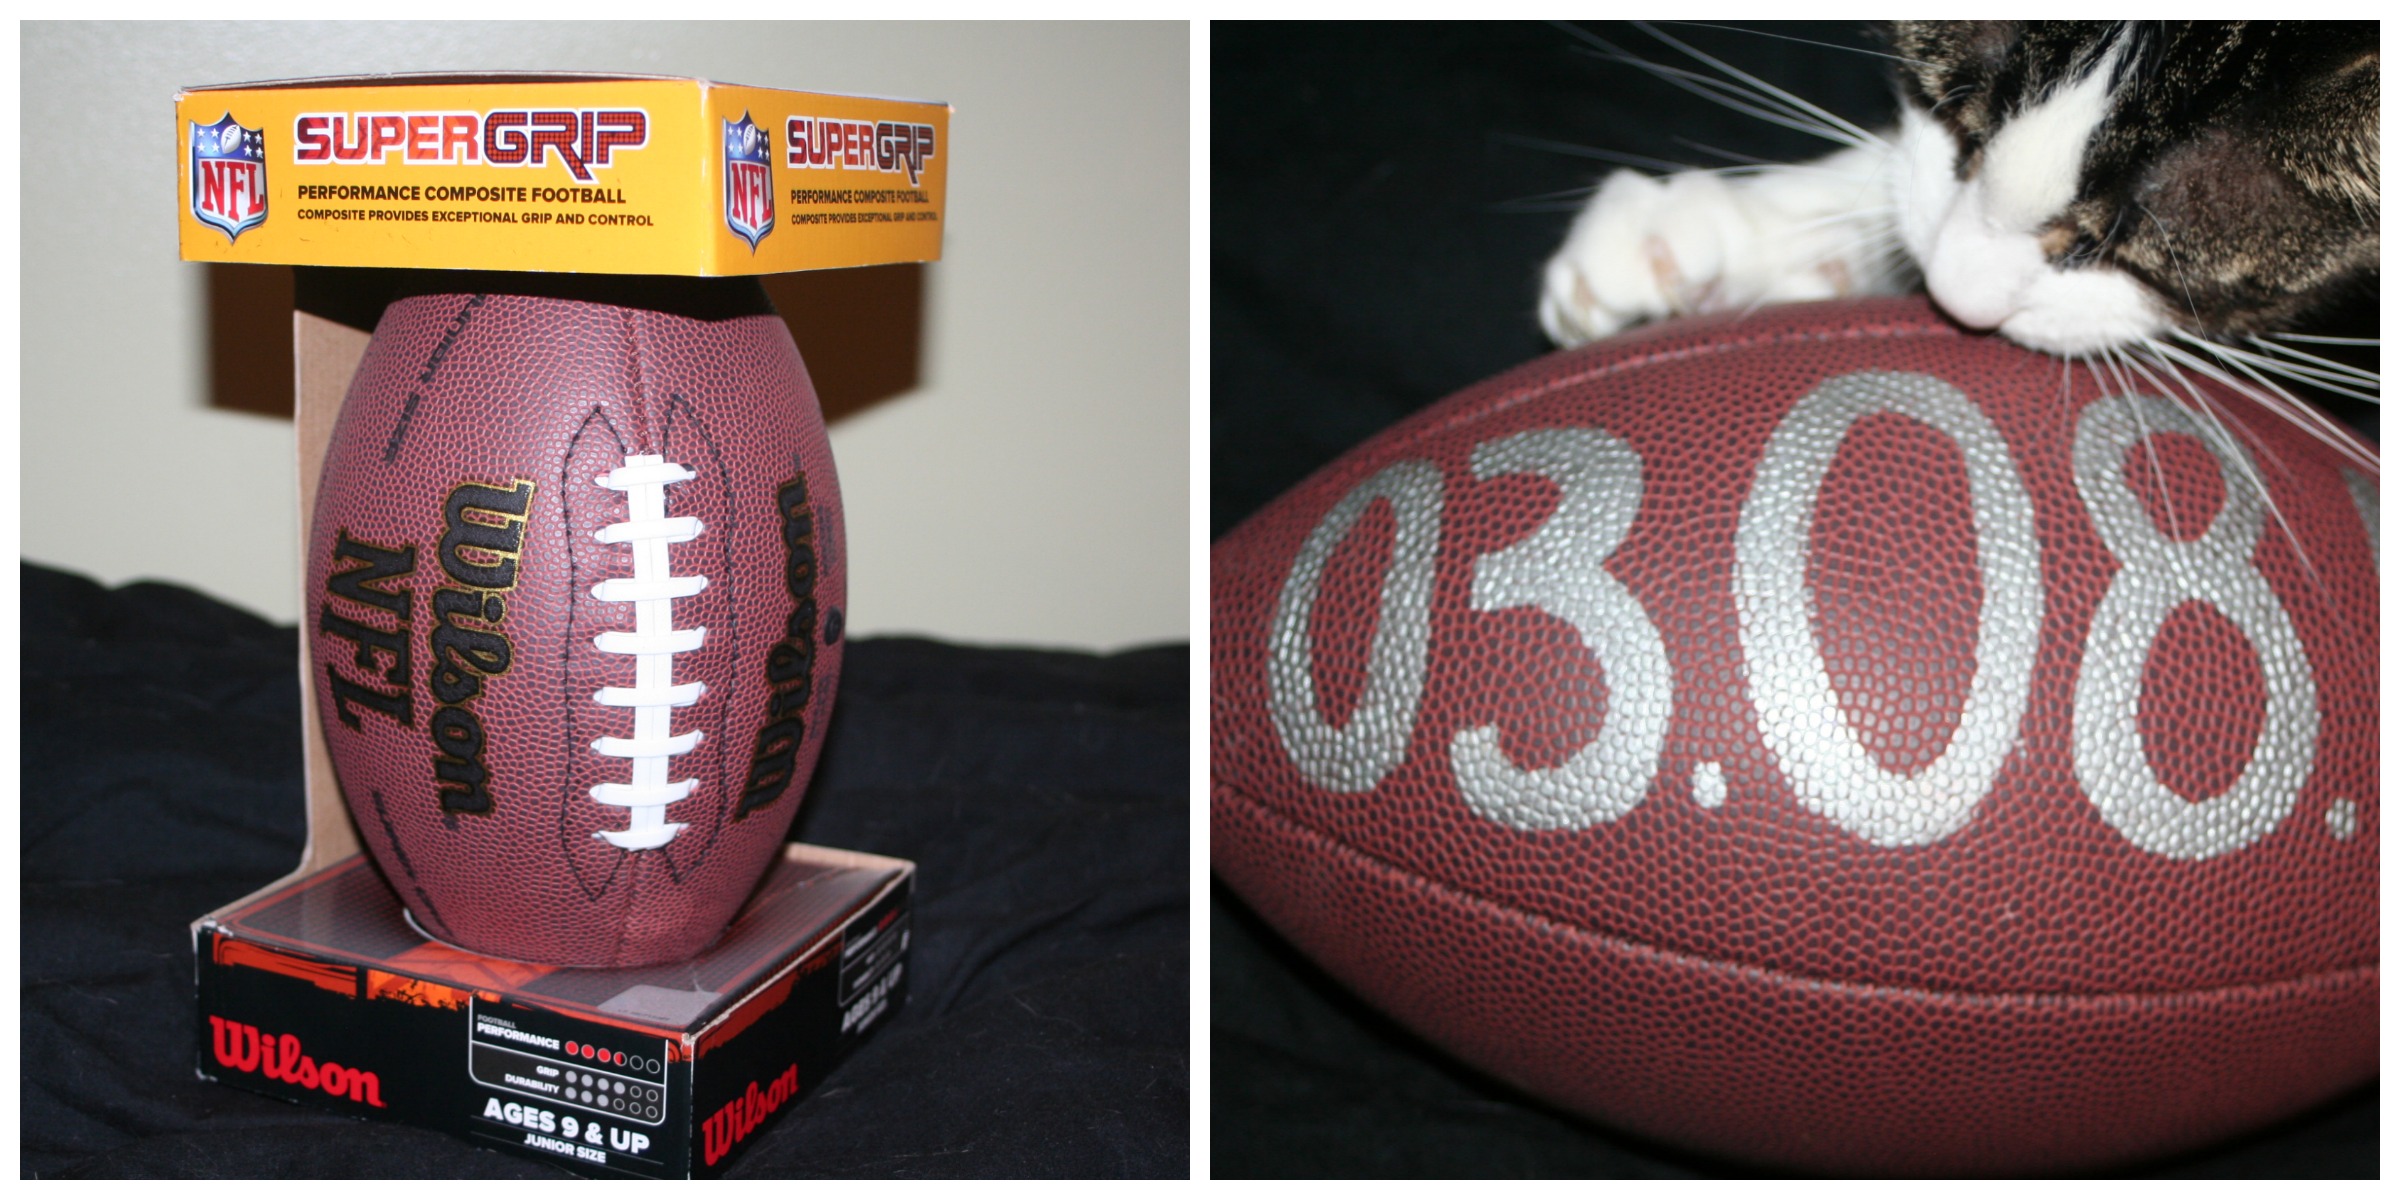 Regular football becomes personalized after just a few minutes and a date with a Sharpie marker. Belle wanted to be the one to show the finished product off
 ![]() // Personal Photos
// Personal Photos
I contemplated baking cupcakes for the engagement photos but for the sake of time and my mental sanity, I opted to head to Wegmans and buy some premade ones. (Side note: If you don’t live near a Wegmans, I highly, highly, HIGHLY recommend stopping at one if you are ever near one. You may think I’m crazy for advocating visits to a grocery store but this place, well, it’s magical.) Despite taking the easy route and buying cupcakes, I decided to make things a little more difficult because I didn’t like the way the frosting was piped onto the cupcakes nor did I like the sprinkles they used. So, I did what any level-headed, carefree person would do – I scraped the frosting off of the cupcakes, put it into a frosting piping bag, redid the frosting and then used sprinkles I had in the house. (Maybe you can add frosting snob to my font snob title.)
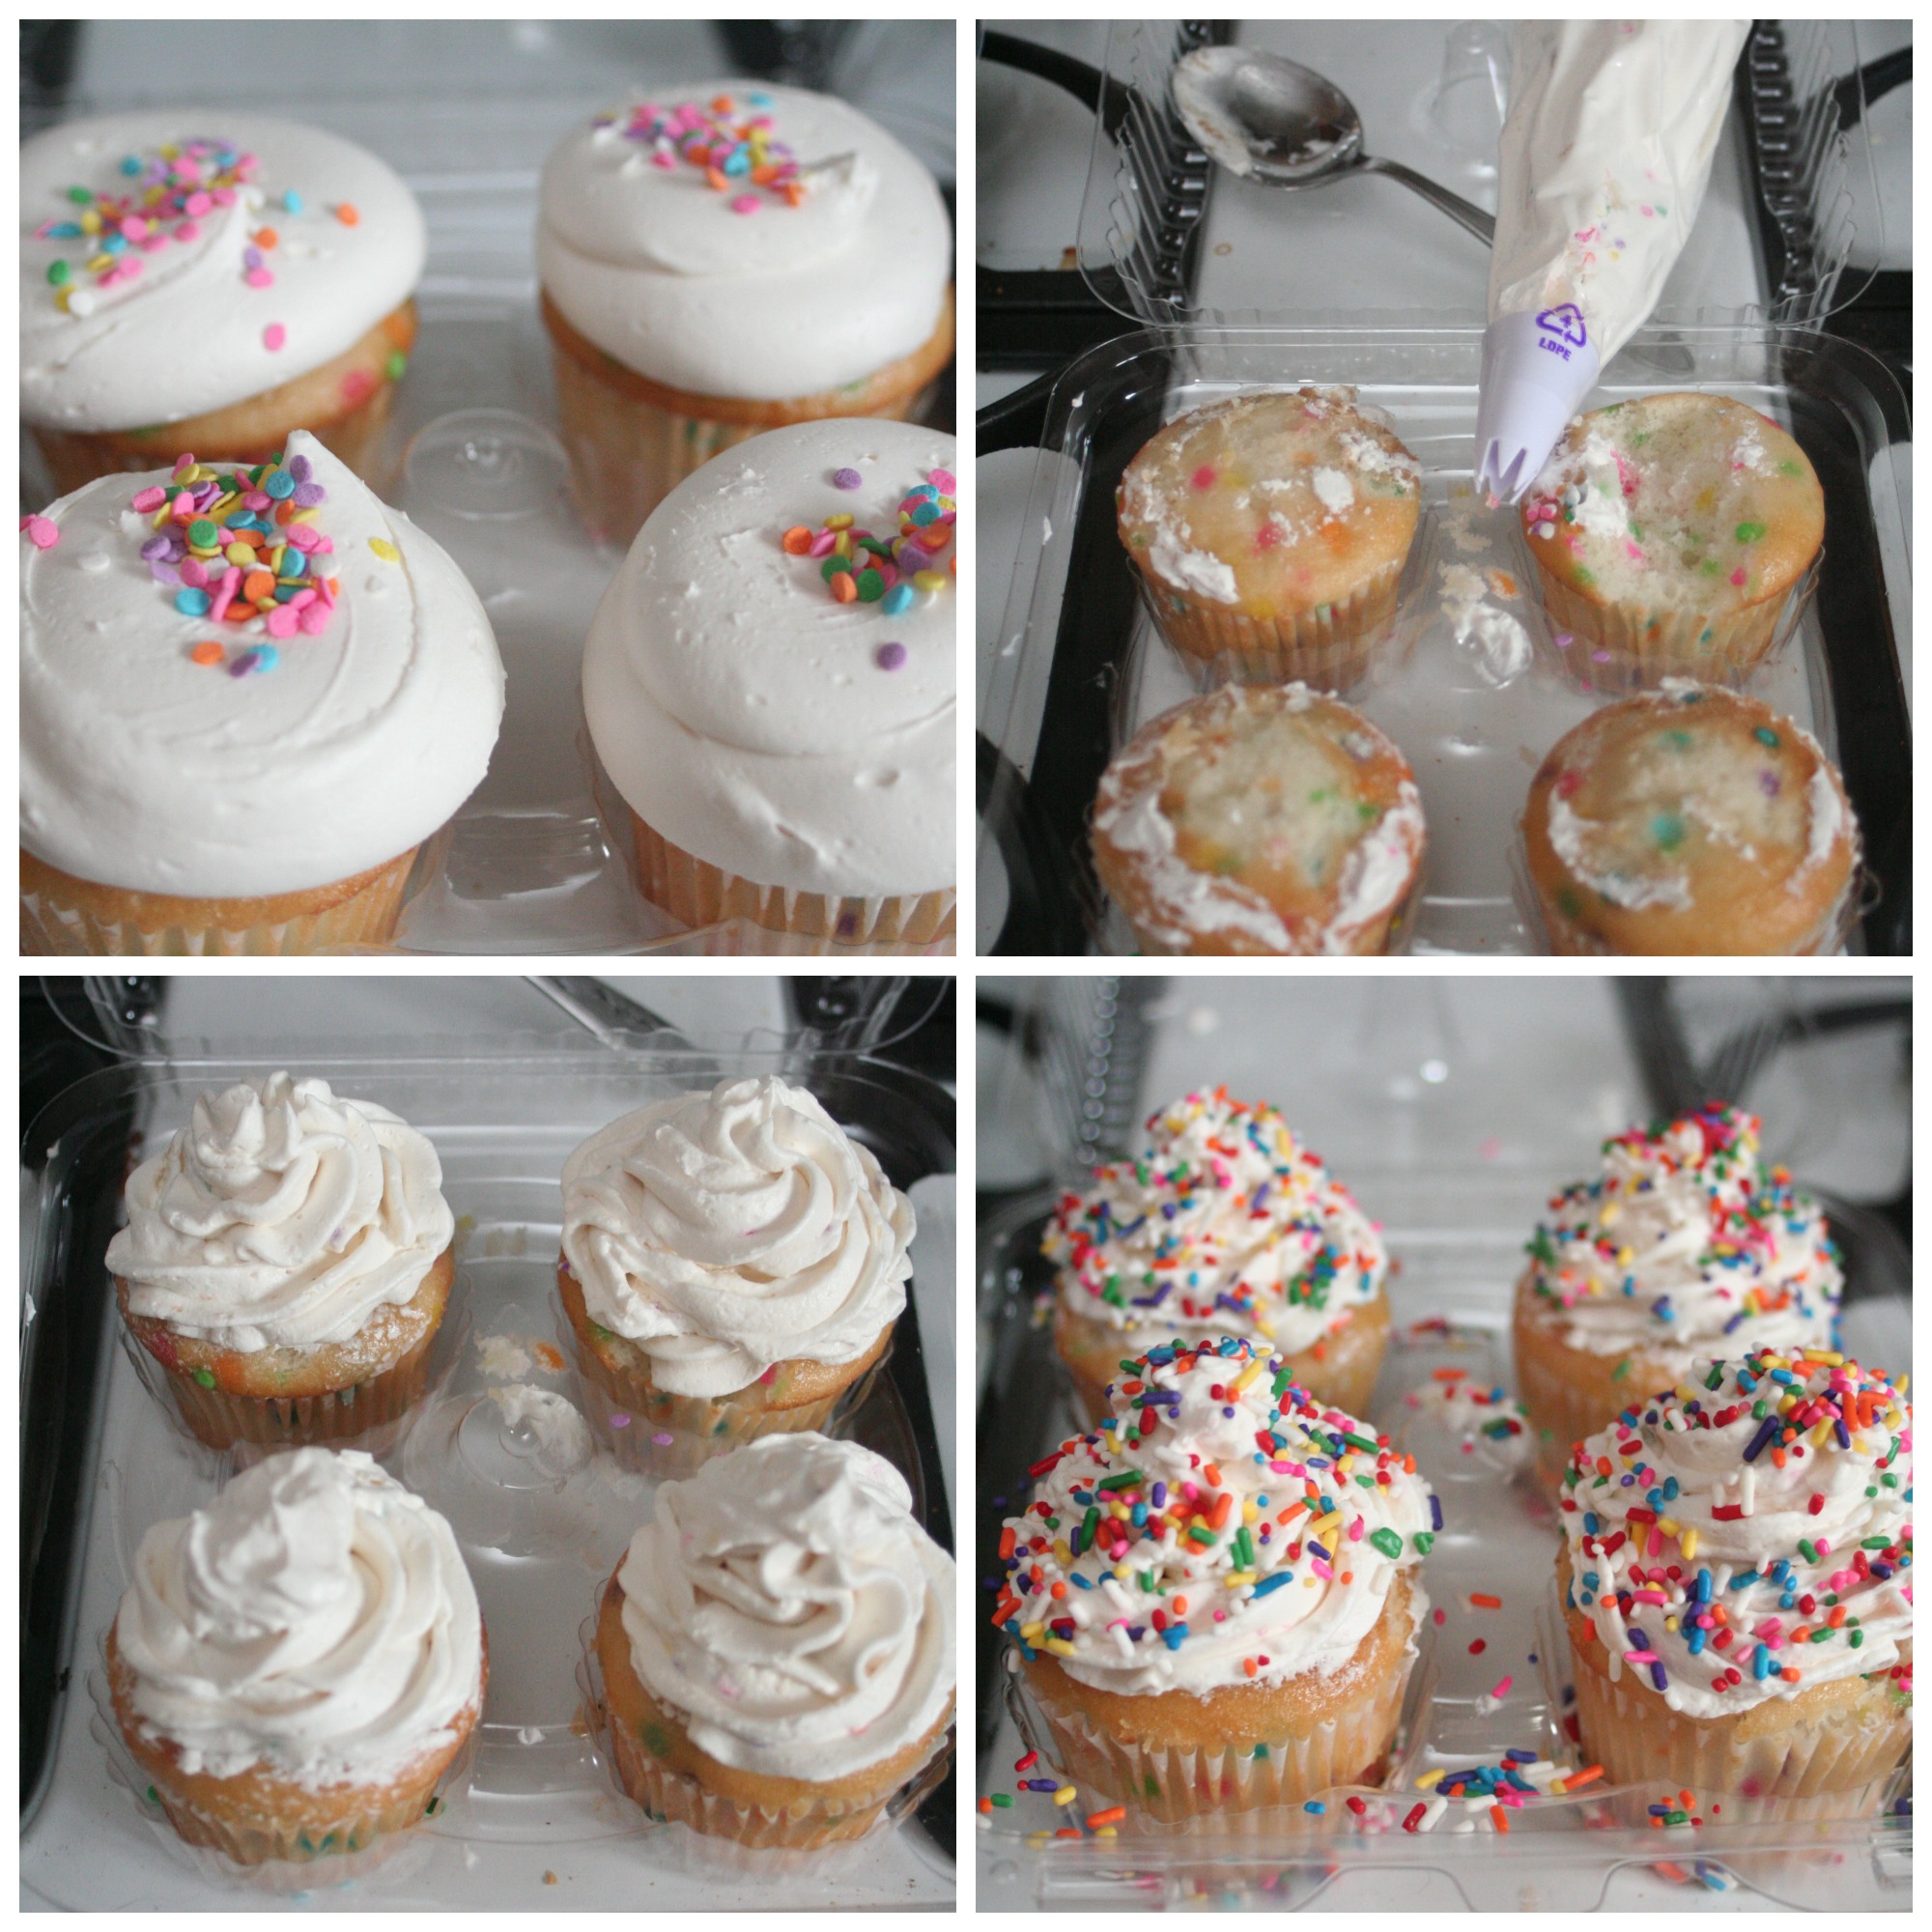 Ahhh, so much better! (like anyone else would have cared or noticed…) // Personal Photo
As for our outfits, I had decided I wanted three: one neutral colored outfit, one wedding color outfit and one outfit with the jersey shirts. Seeing we were going to be in a public park for the photos, outfit changes needed to be as easy as possible without us getting tickets for indecent exposure. I decided that we could keep the same pants on (jeans) for all three outfits and stay in the same shoes as well (sneakers for him, zebra print flats for me).
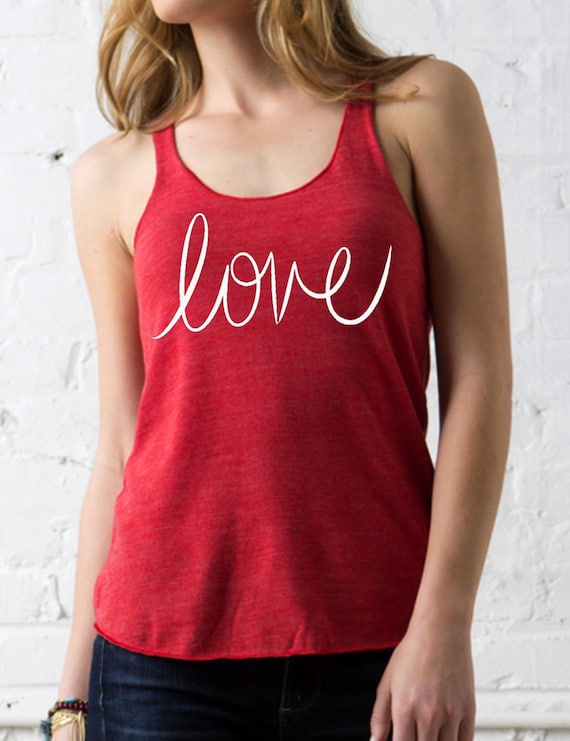

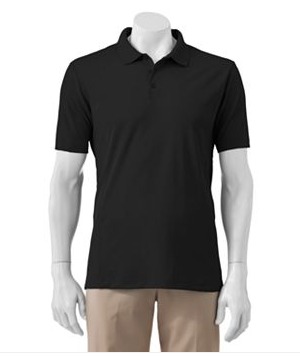
For me: a tank top with love or something similar written on it but in a neutral color and a black cardigan; For Mr. PB: a black polo // Source: Etsy, Target and Kohl’s


For me: A gray sweater with a pop of blue using an infinity scarf; For Mr. PB: a purple polo // Source: Target, Target and Kohl’s
For our last outfit, I needed custom jersey shirts. I could have ordered the shirts from a website like Vistaprint or CustomInk but I knew it was something I could DIY using my Silhouette. I bought dark gray shirts and dark shirt printable iron-on transfer paper from Hobby Lobby. Using the Silhouette, I cut out the numbers and our future last name for the back and a Mr. for him and a Mrs. for me for the front. After they were cut out and carefully lined up, I ironed them on and voila! Our shirts were complete.
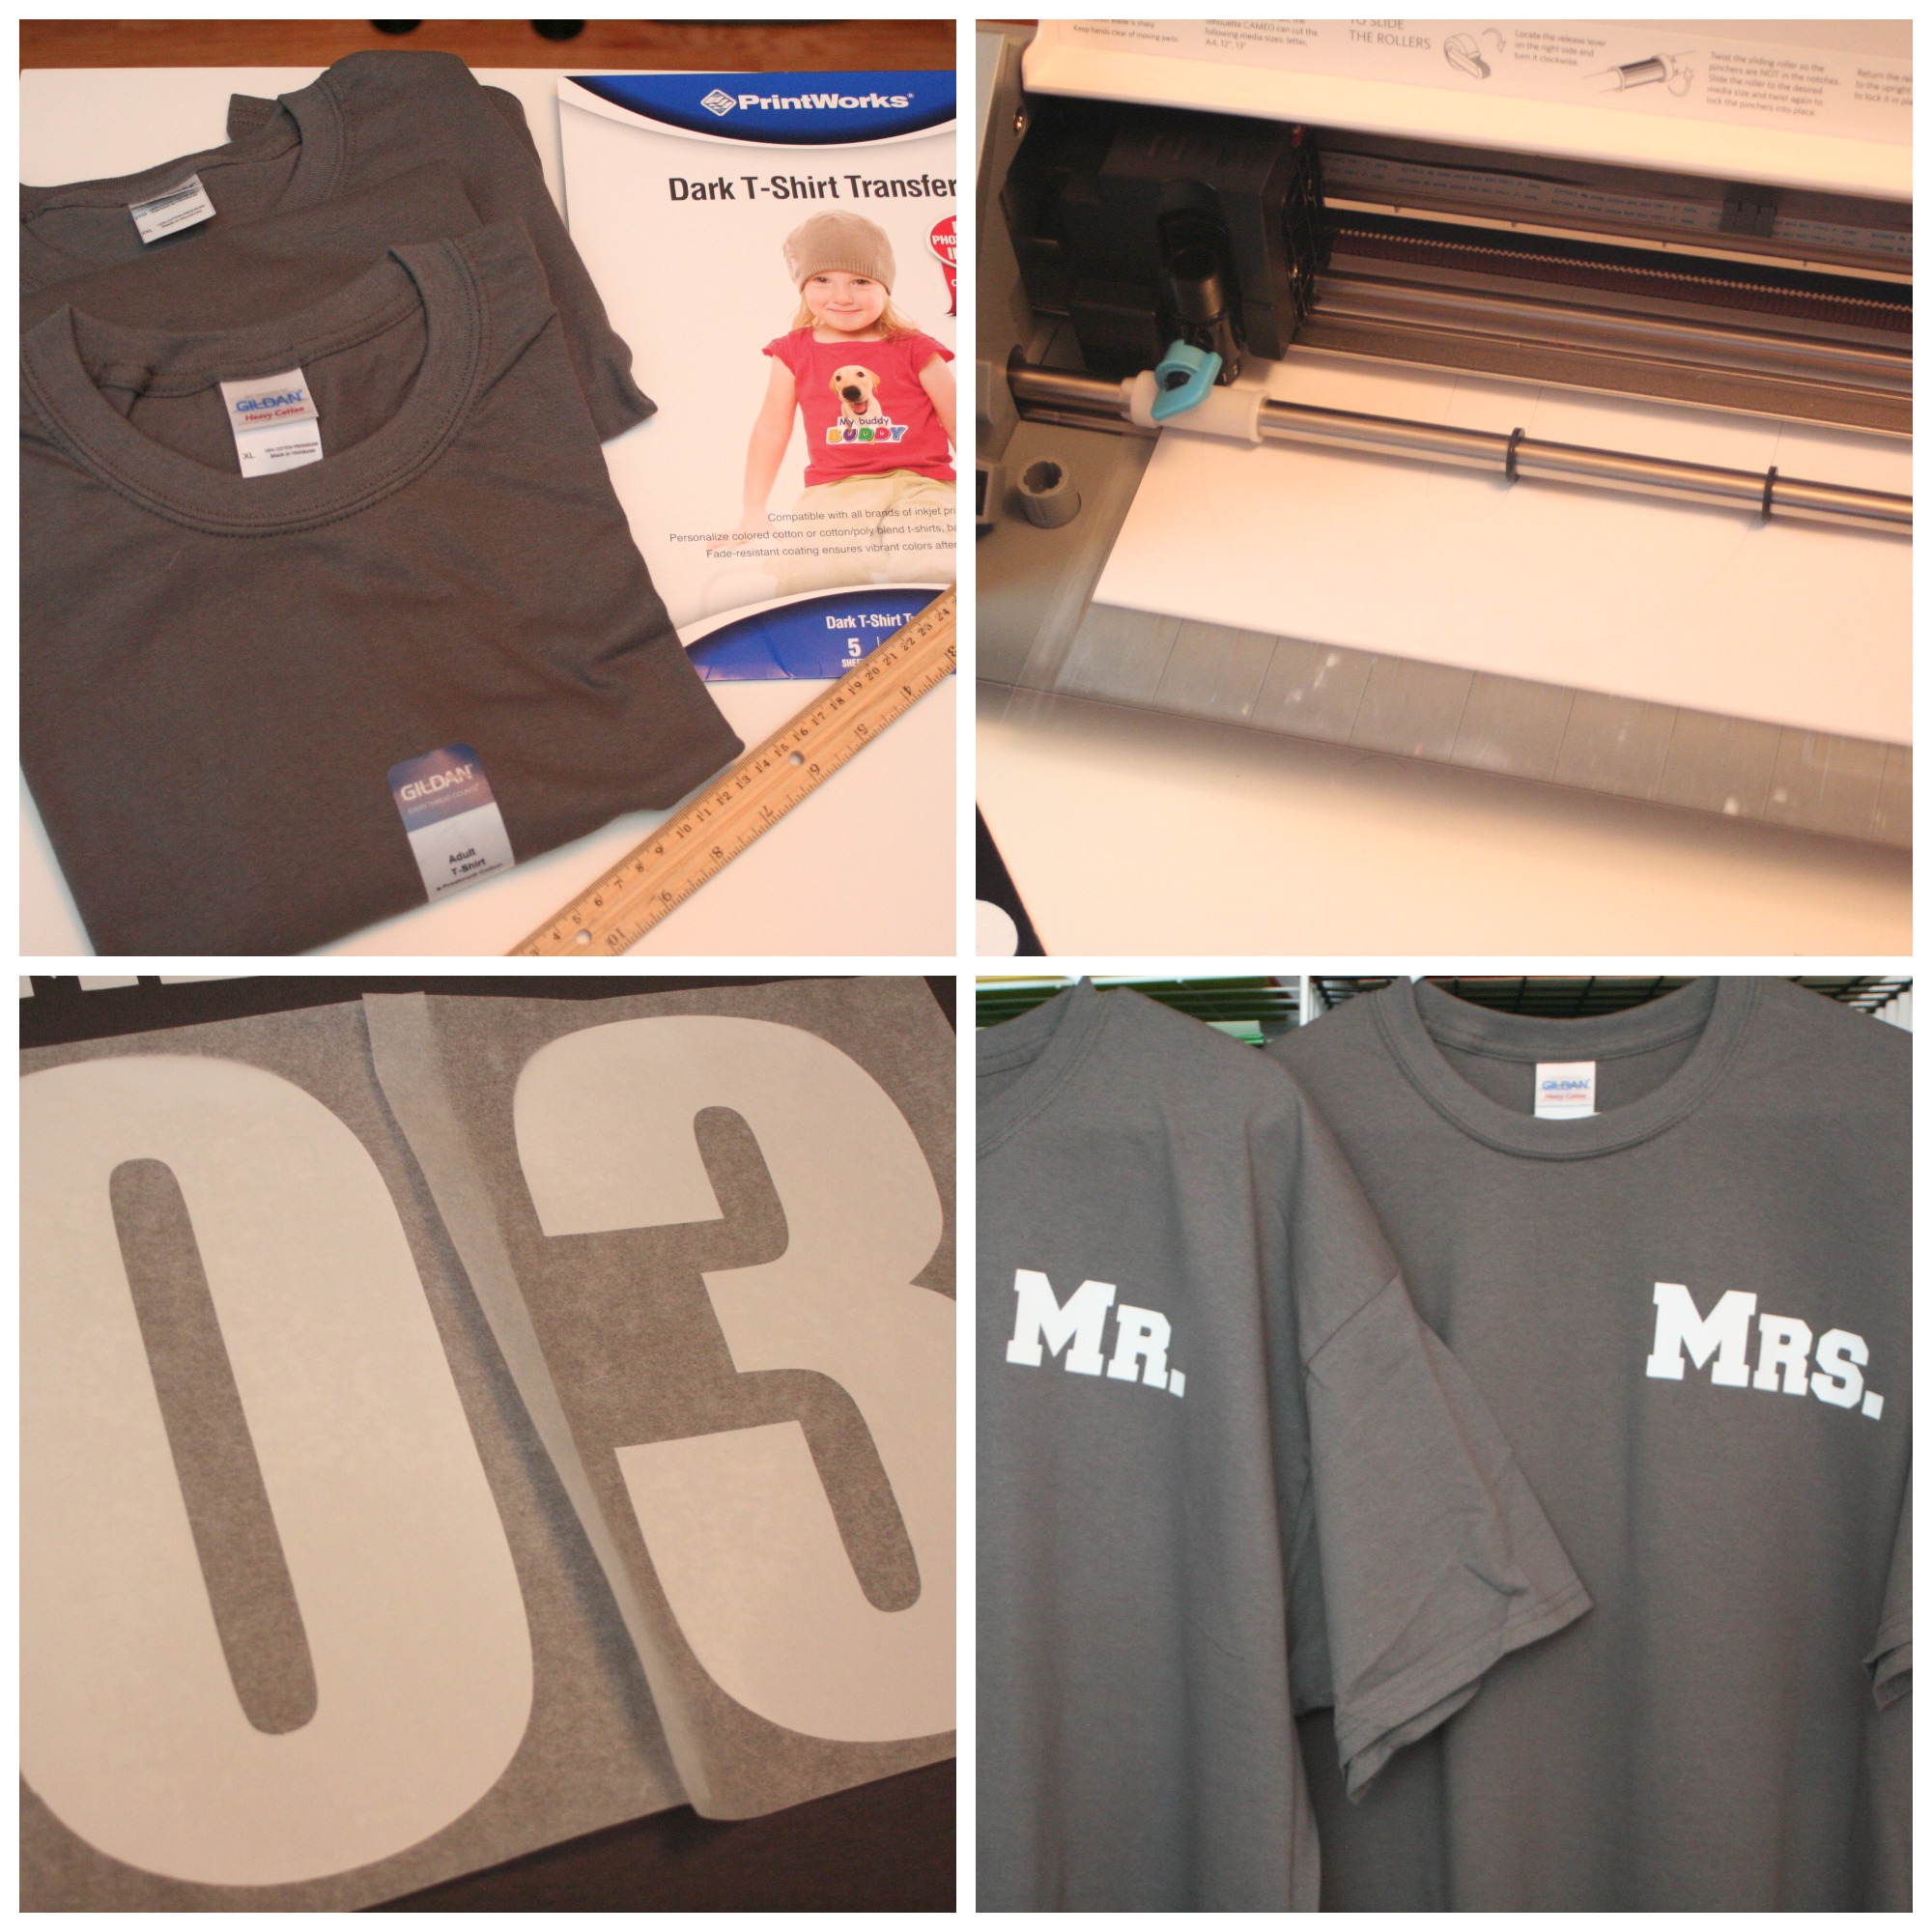 Totally worth the DIY // Personal Photos
Now if all the props, clothes and ducks were in a row, it was time for the engagement photos!
Did you round up props for your engagement pictures? How did your coordinate your outfits?